Wifi sharing ( Windows 10 mobile hotspot ) on laptop help users can connect to Wifi for work, entertainment, avoid interrupting work when losing network.
How to use Wifi sharing ( Windows 10 mobile hotspot ) in Windows 10
Quick start Guide:
Go to the square icon in the lower right corner of the screen -> Select All settings -> Select Network & internet -> Select Mobile hostpot -> Adjust arbitrary names and passwords -> Turn on Wifi broadcasting
Note: Only applicable to the new Windows 10 universal update with this feature, if you do not have the device, you should update to the latest version.
Step 1: Click on the square icon in the bottom right corner of the screen.

Wifi sharing
Step 2: Next, select All Settings.

Step 3: Then select Network & Internet.

Wifi sharing
Step 4: Continue to select Mobile hotspot.
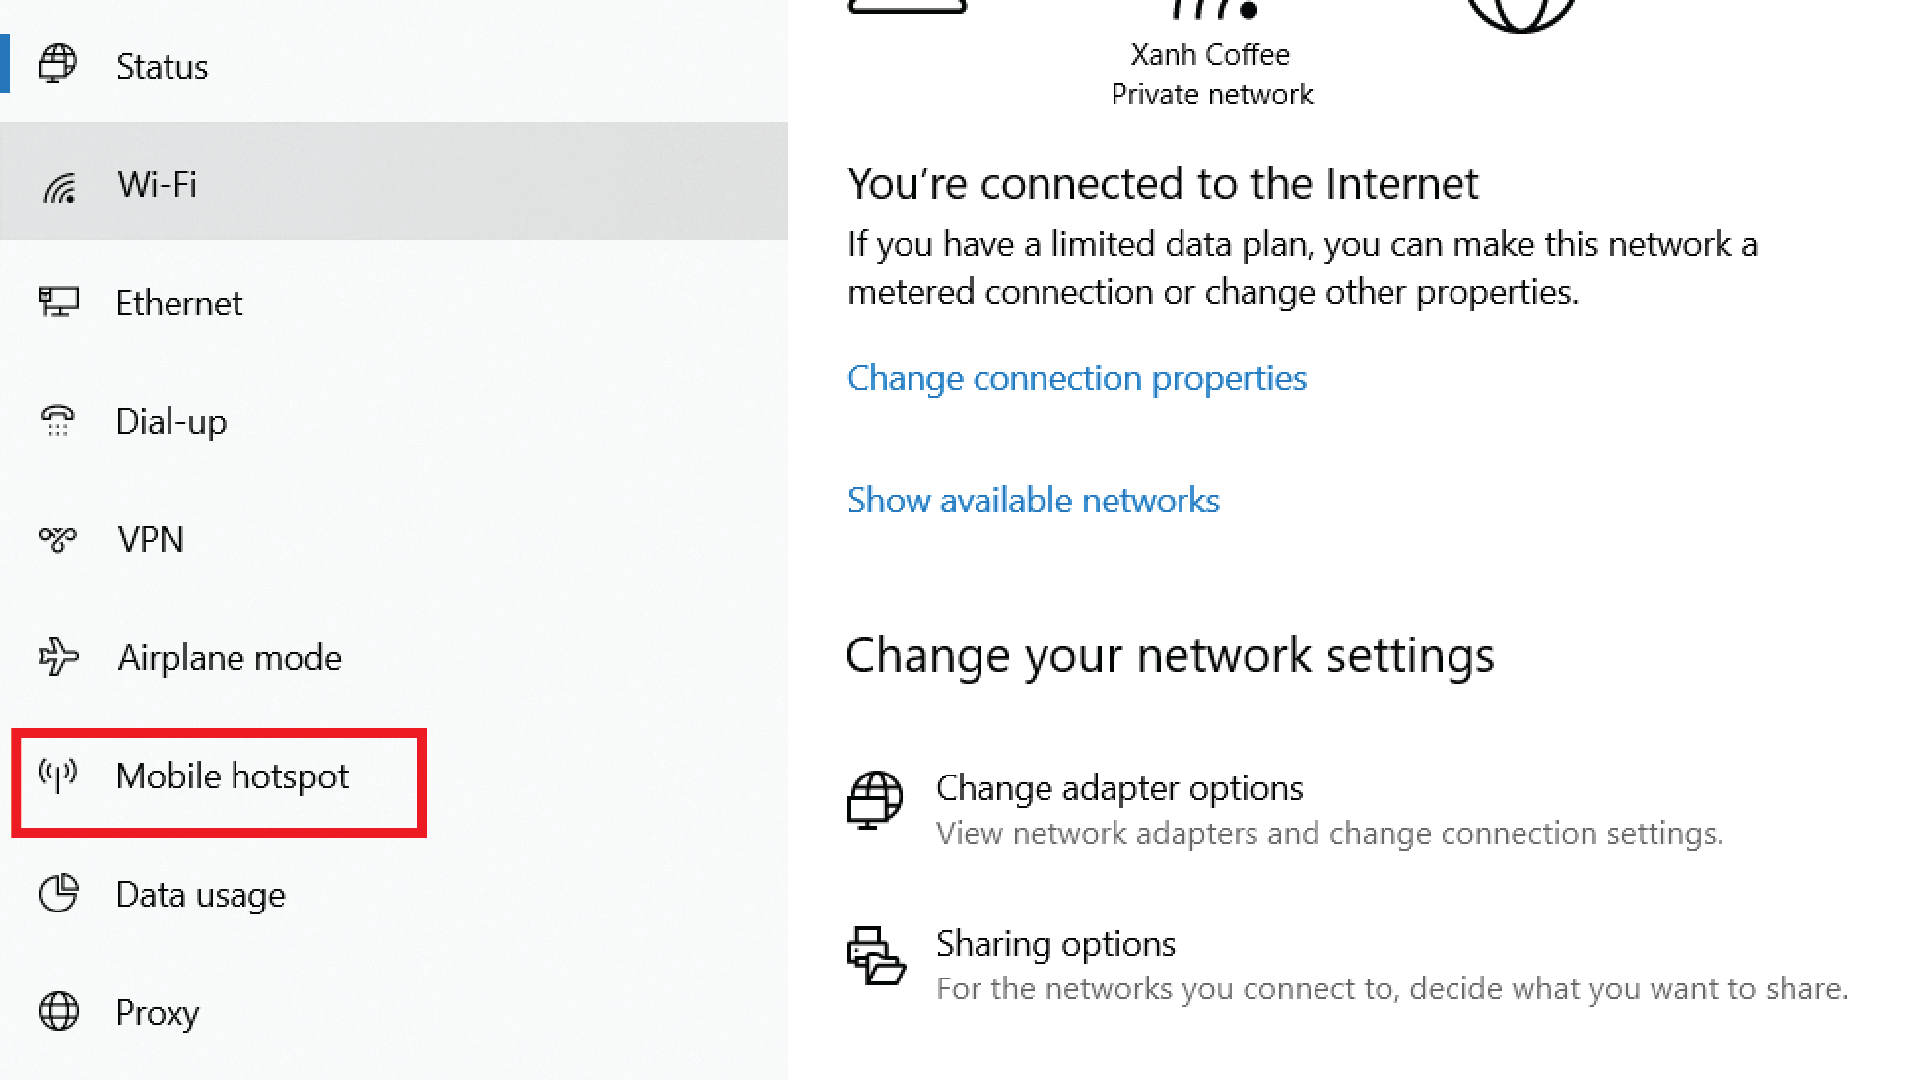
wifi sharing
Step 5: Here you can Edit to change the name and password to broadcast Wifi.

Windows 10 mobile hotspot
Step 6: When you’re done, select Save to save your Wifi name and password.

Step 7: Click on On to turn on Mobile Hotspot

When a device connects to you will know that device information (Display device name, ip display and Mac Address display).
Note: Only up to 8 devices can be connected.
Thanks for reading ! If there are questions about product specifications, you can comment I will try to answer soon. Please like, subscribe to my channel to motivate me to make even better videos.
Subcribe My Channel here


Trả lời